Your first bulk update
A guided walkthrough from uploading a CSV to seeing updated records in Filevine.
This walkthrough takes you from a CSV on your desktop to updated records in Filevine — start to finish in about ten minutes. If you can run a VLOOKUP in Excel, you already know most of what's happening here.
What you'll need
- A connected Filevine organization. If you haven't done that yet, start with Connecting Filevine and come back.
- A CSV file with:
- At least one column that identifies the Filevine project (the project ID or record ID).
- At least one column containing the data you want to change.
- Enough credits in your plan to cover the update. VineMerge charges 1 credit per row — see the credits intro for how that works and how to top up.
Excel analogy: think of your CSV the way you'd think of the source sheet in a VLOOKUP. Each row represents one Filevine project. The ID column is your lookup key — it tells VineMerge which project to update. Every other column is a value VineMerge will write into that project's matching Filevine field.
Step 1 — Upload your CSV
From the VineMerge dashboard, click New bulk update and drop your CSV into the upload area (or browse for it). Most firm-sized files — up to around 50MB, tens of thousands of rows — upload in a few seconds. VineMerge accepts standard UTF-8 CSVs; if your file was exported from Excel on Windows, re-save it as CSV UTF-8 to avoid mojibake in names and addresses.
VineMerge does a quick sanity check on the file — valid CSV, a header row, non-empty — before moving you on.
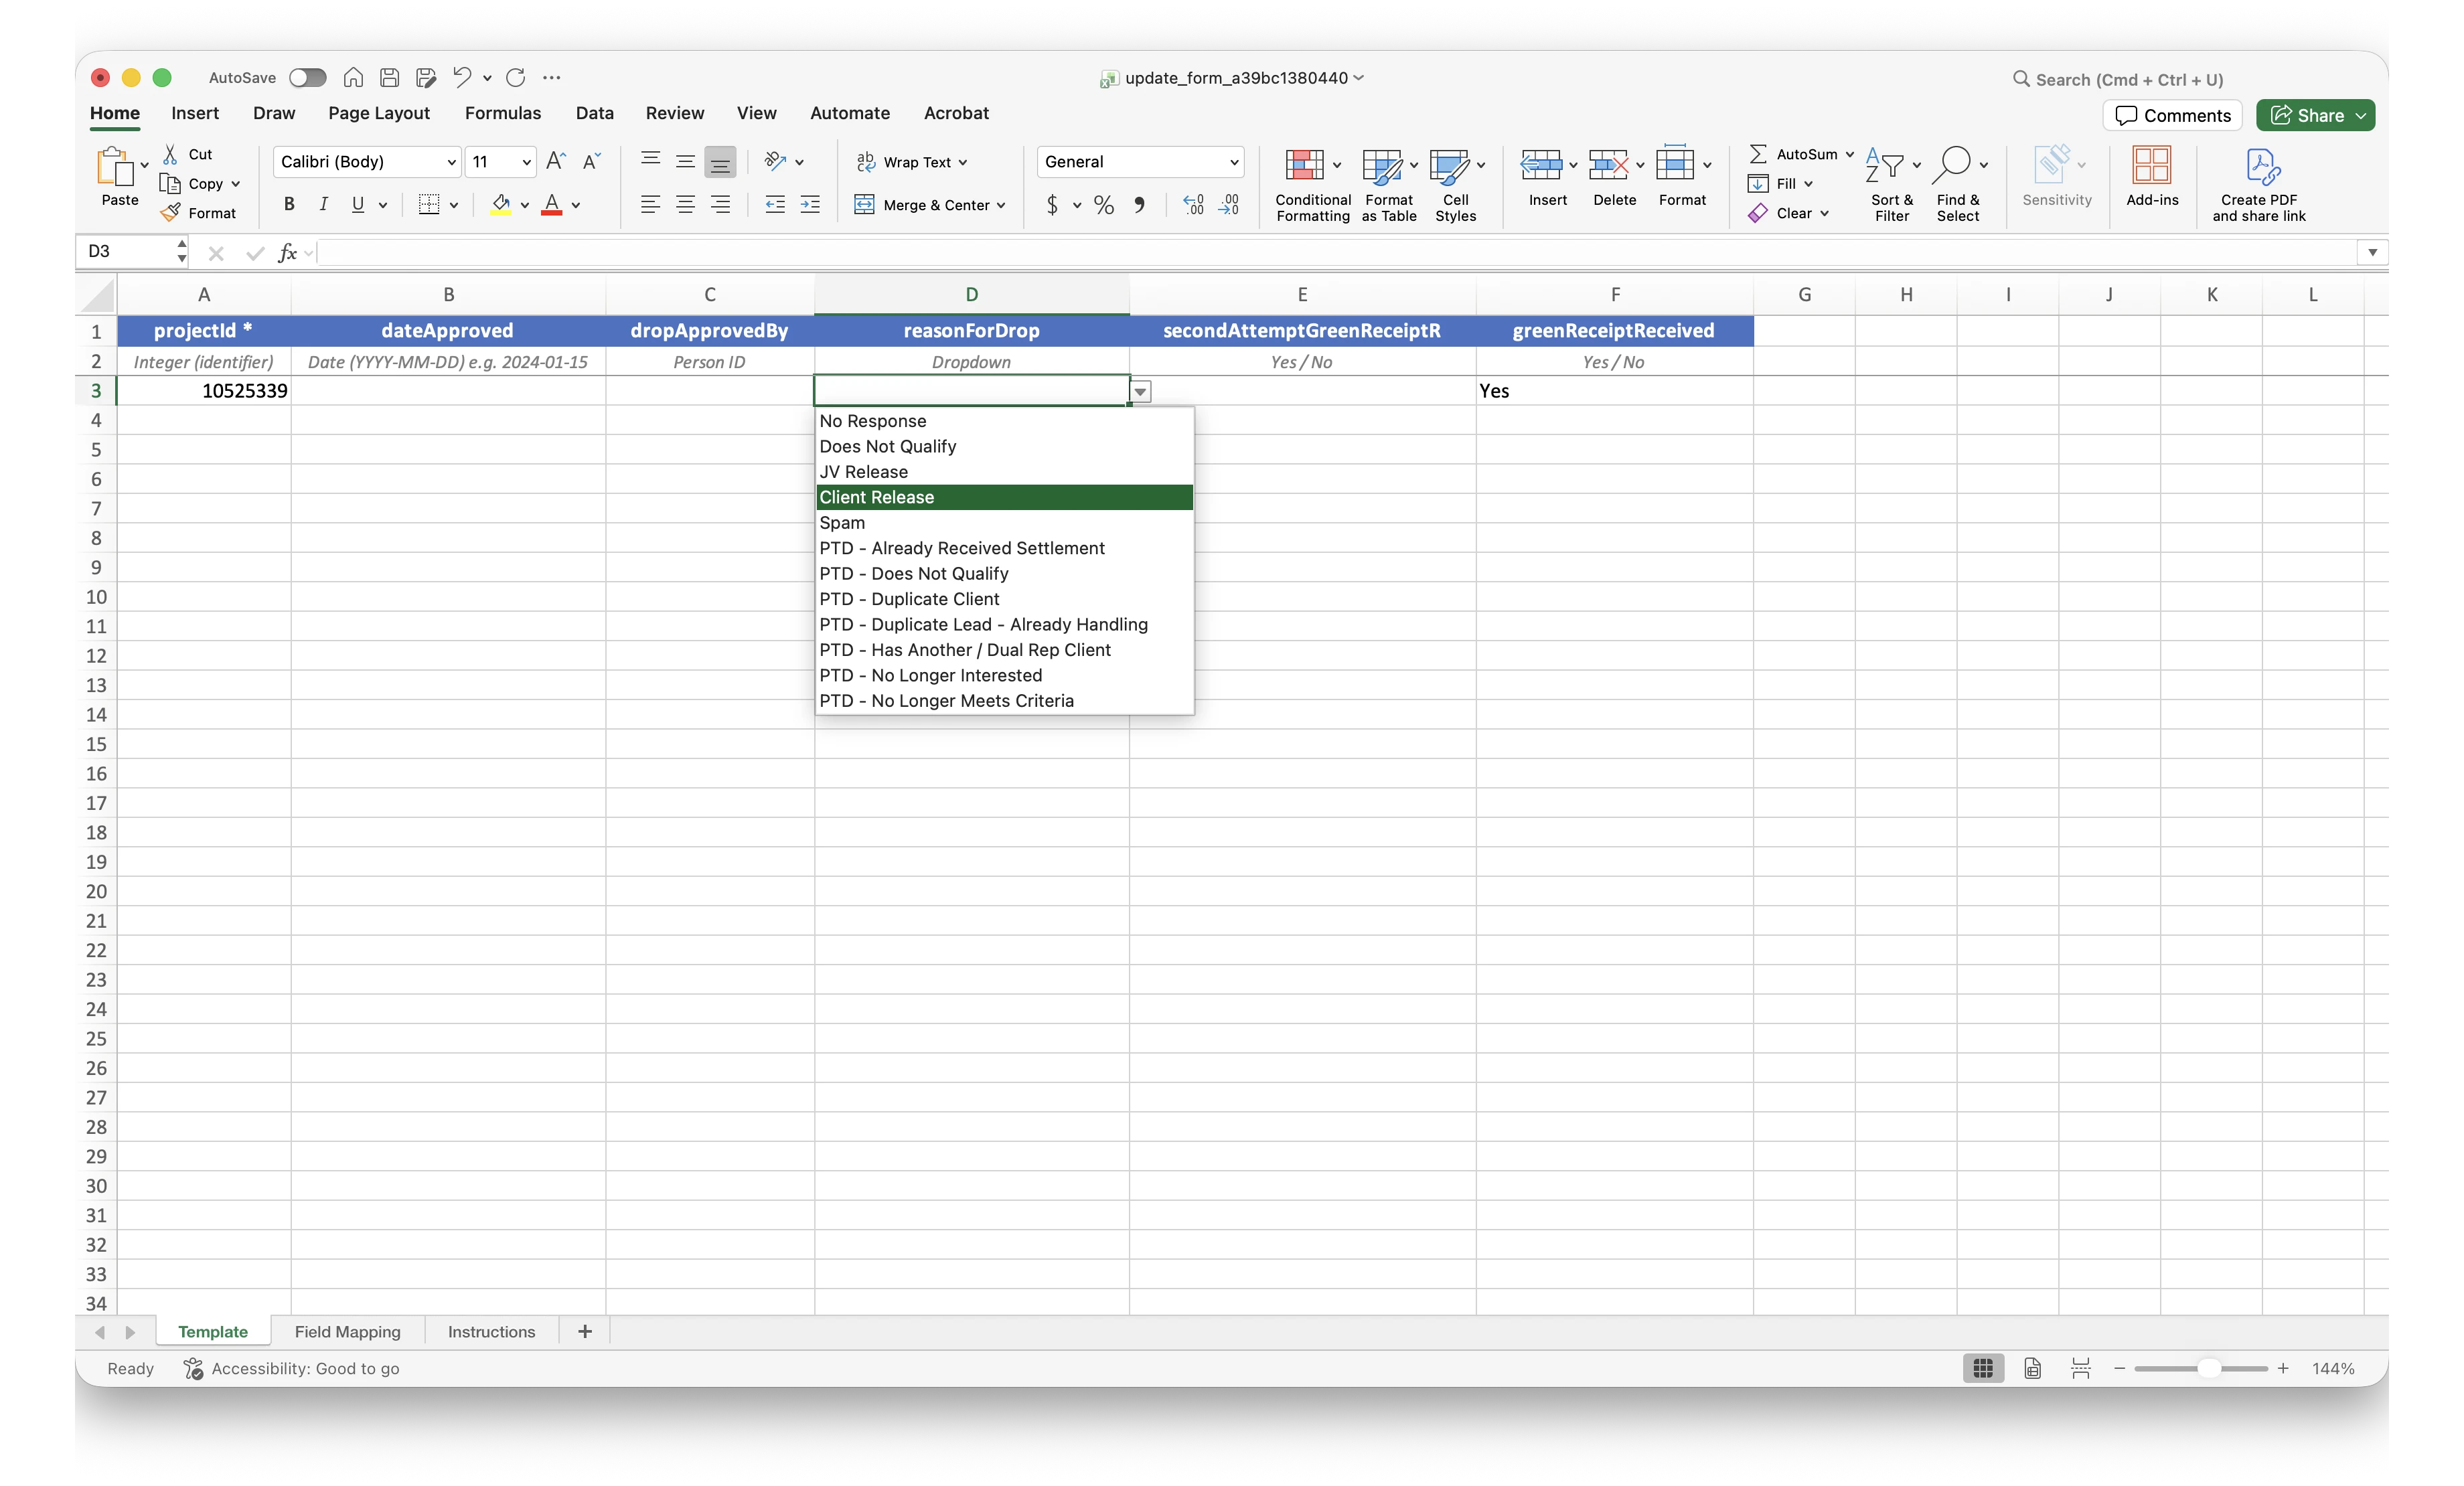
Step 2 — Map your columns
VineMerge reads your CSV's header row and shows each column next to a dropdown of Filevine fields. Pick the Filevine field each CSV column should write into.
This is essentially the VLOOKUP conversation in reverse: instead of telling Excel "look up this value in that sheet," you're telling VineMerge "the Client Phone column in my spreadsheet should be written to the Client Phone field in Filevine."
A few rules to keep in mind:
- The ID column is required. Map it to the Filevine project ID or record ID — this is how VineMerge knows which project each row belongs to. Without it, there's no "lookup key" and the run can't proceed.
- You don't have to map every column. Columns you leave unmapped are ignored.
- VineMerge will auto-suggest mappings when column names clearly match Filevine field names. Always double-check the suggestions before moving on.
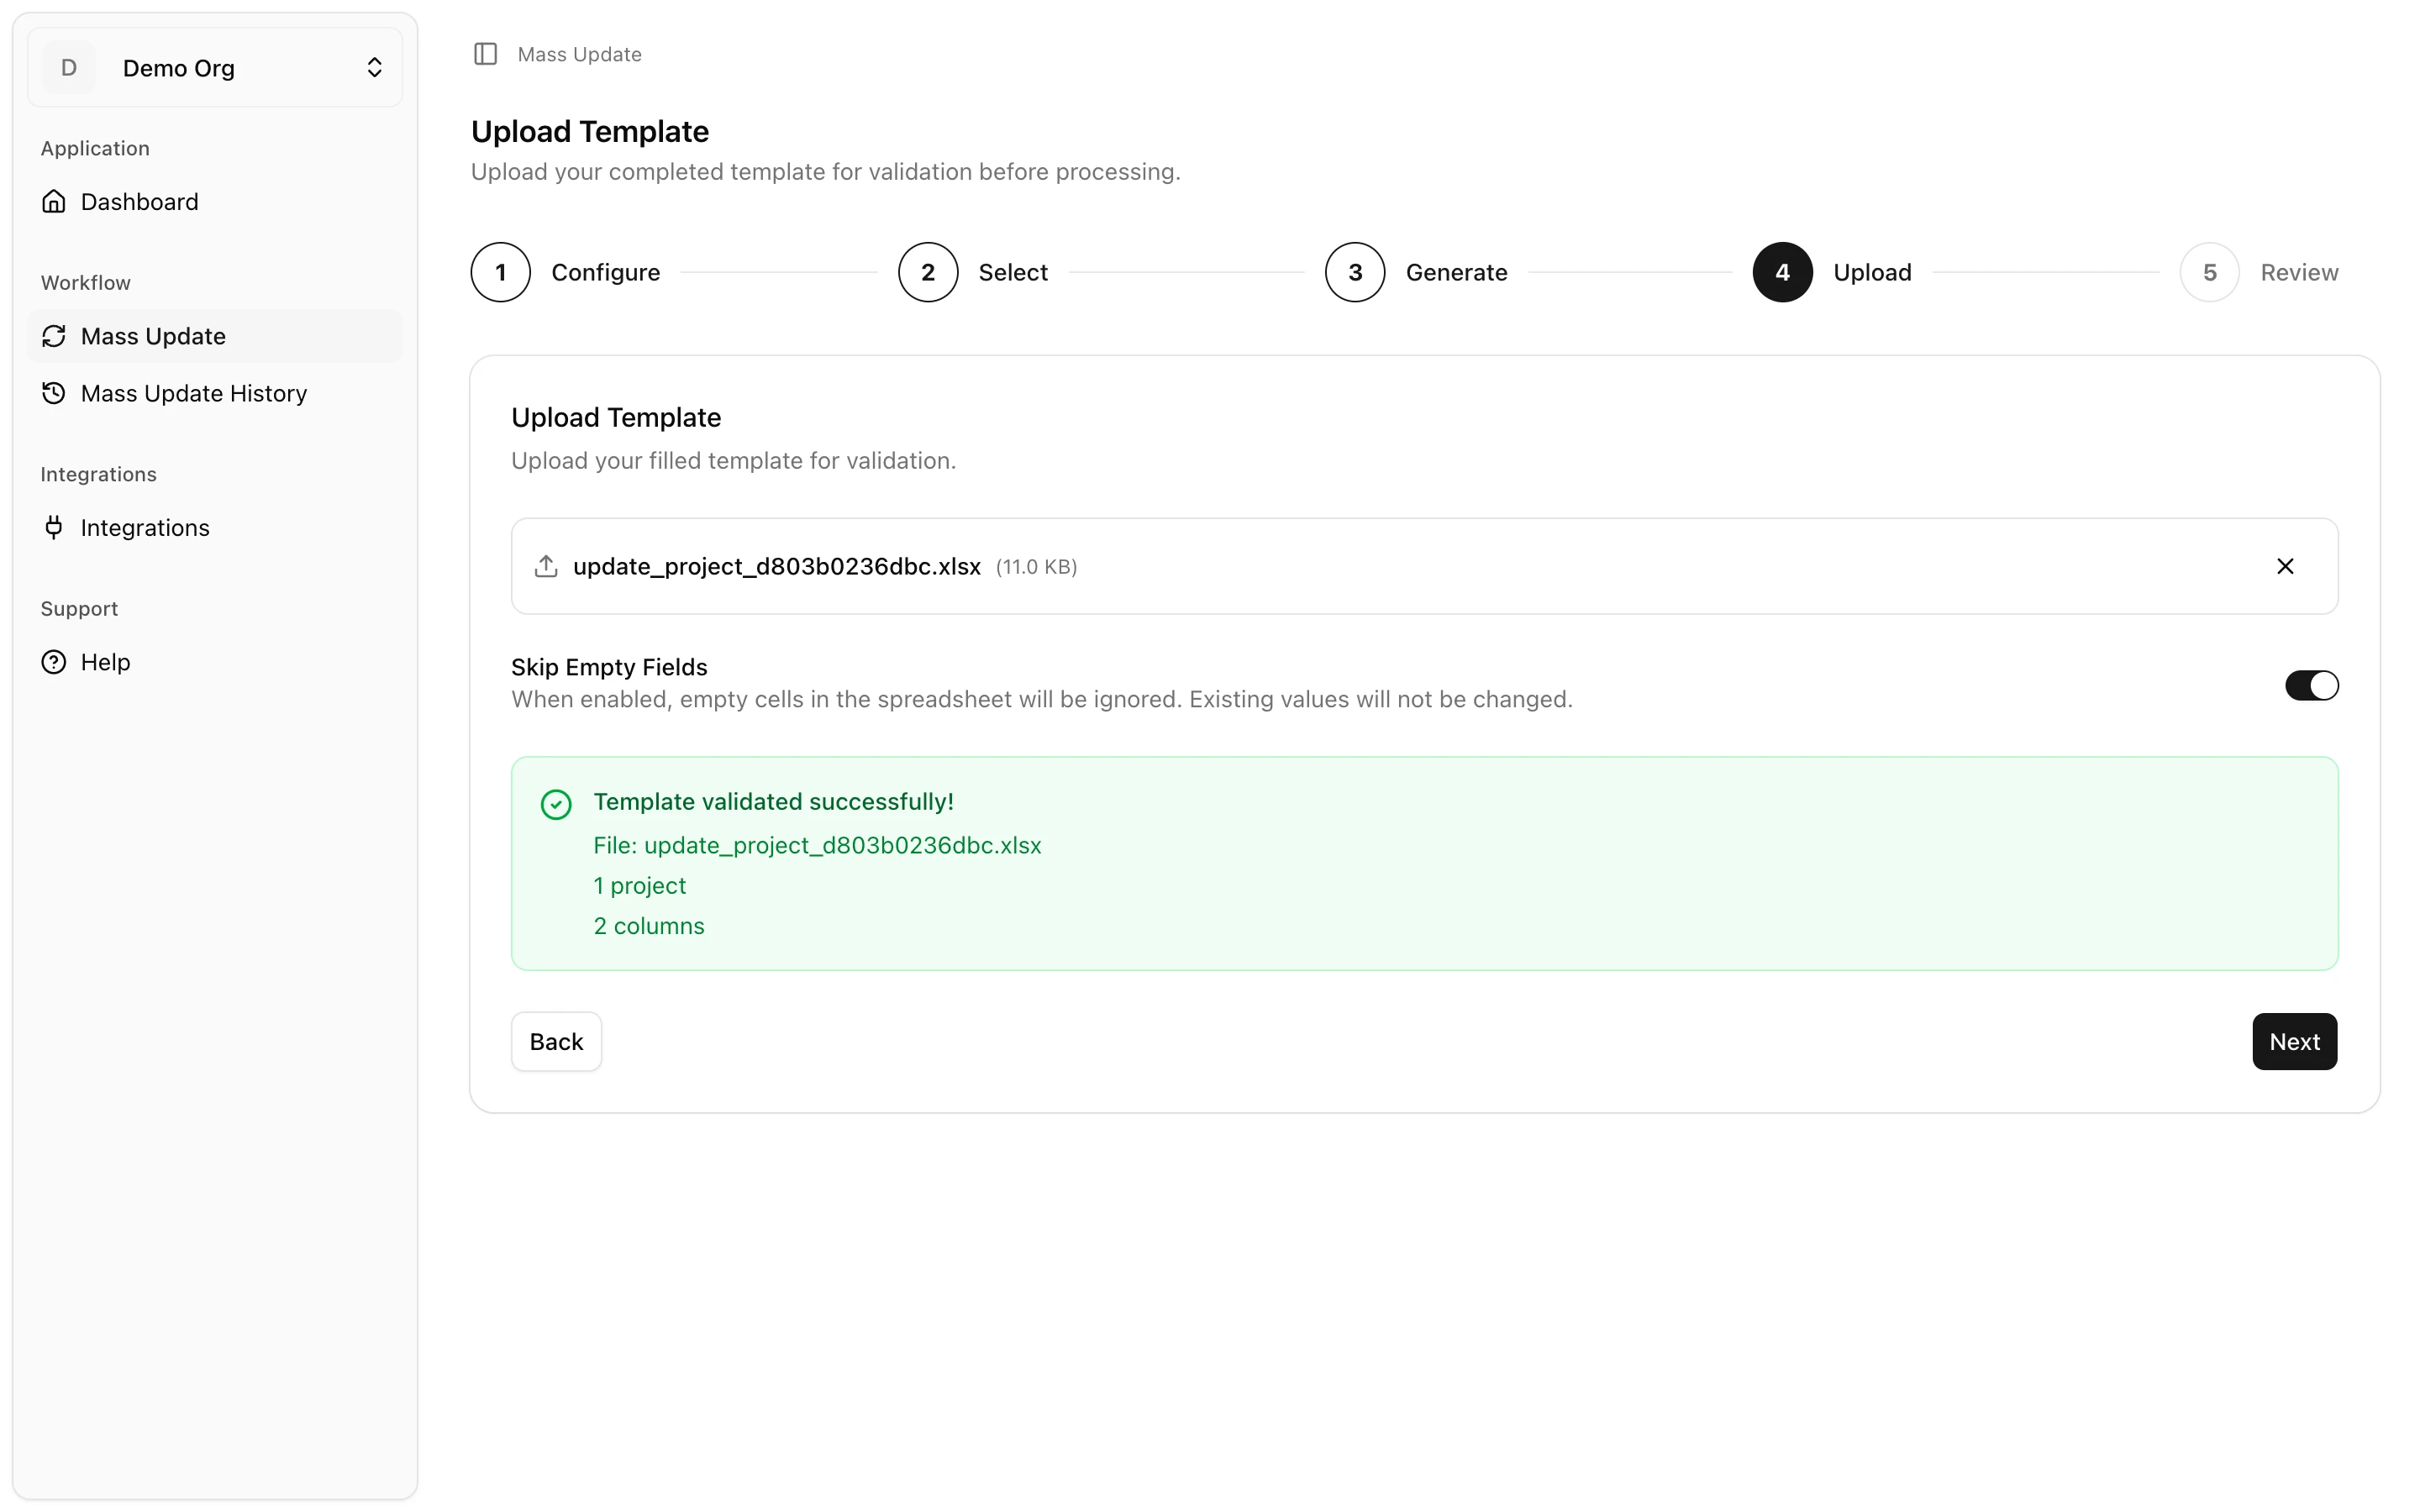
Step 3 — Preview proposed changes
Before anything is written to Filevine, VineMerge shows you a side-by-side preview: the current value in Filevine next to the proposed new value from your CSV, row by row.
This is the single most important step. Scan for:
- Unchanged rows — rows where the current and proposed values are identical. These are flagged so you don't spend credits rewriting data that's already correct.
- Missing IDs — rows whose ID column is blank or doesn't match a project in Filevine. These can't be updated and will be skipped.
- Formatting issues — dates in the wrong format, phone numbers with unexpected characters, values that are too long for the target field.
You can go back to Step 2 and re-map if something looks off, or fix your CSV and re-upload.

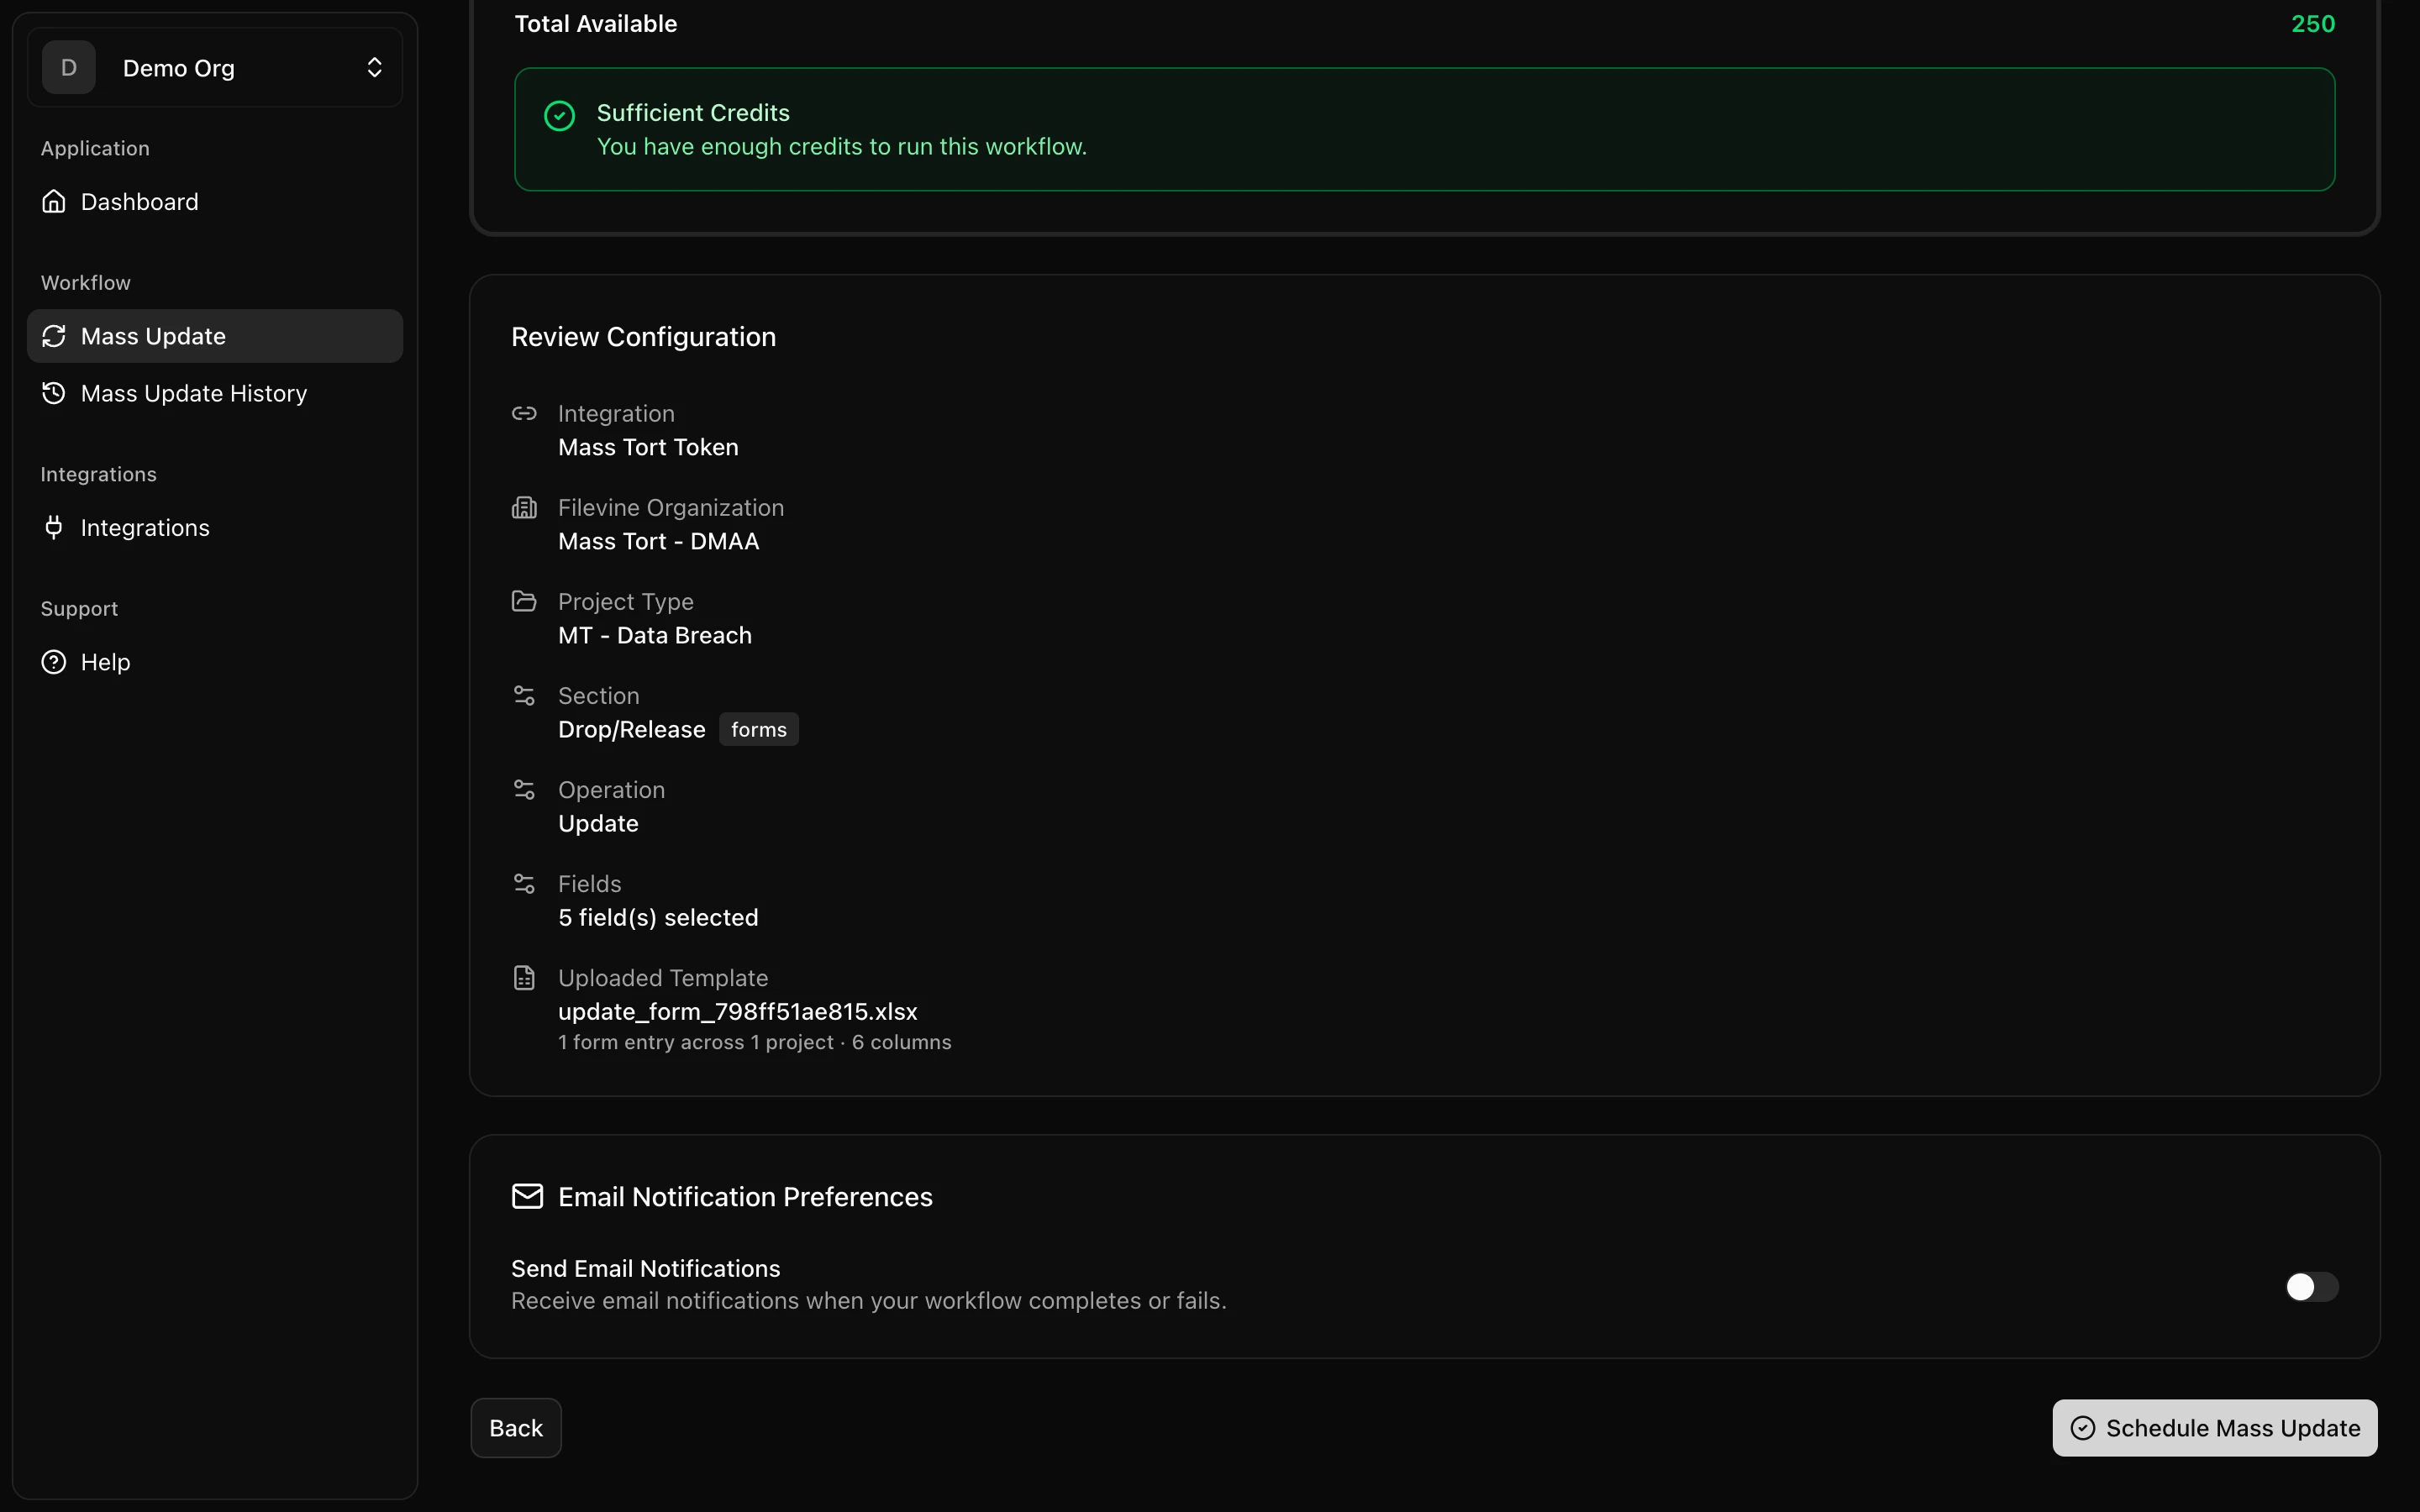
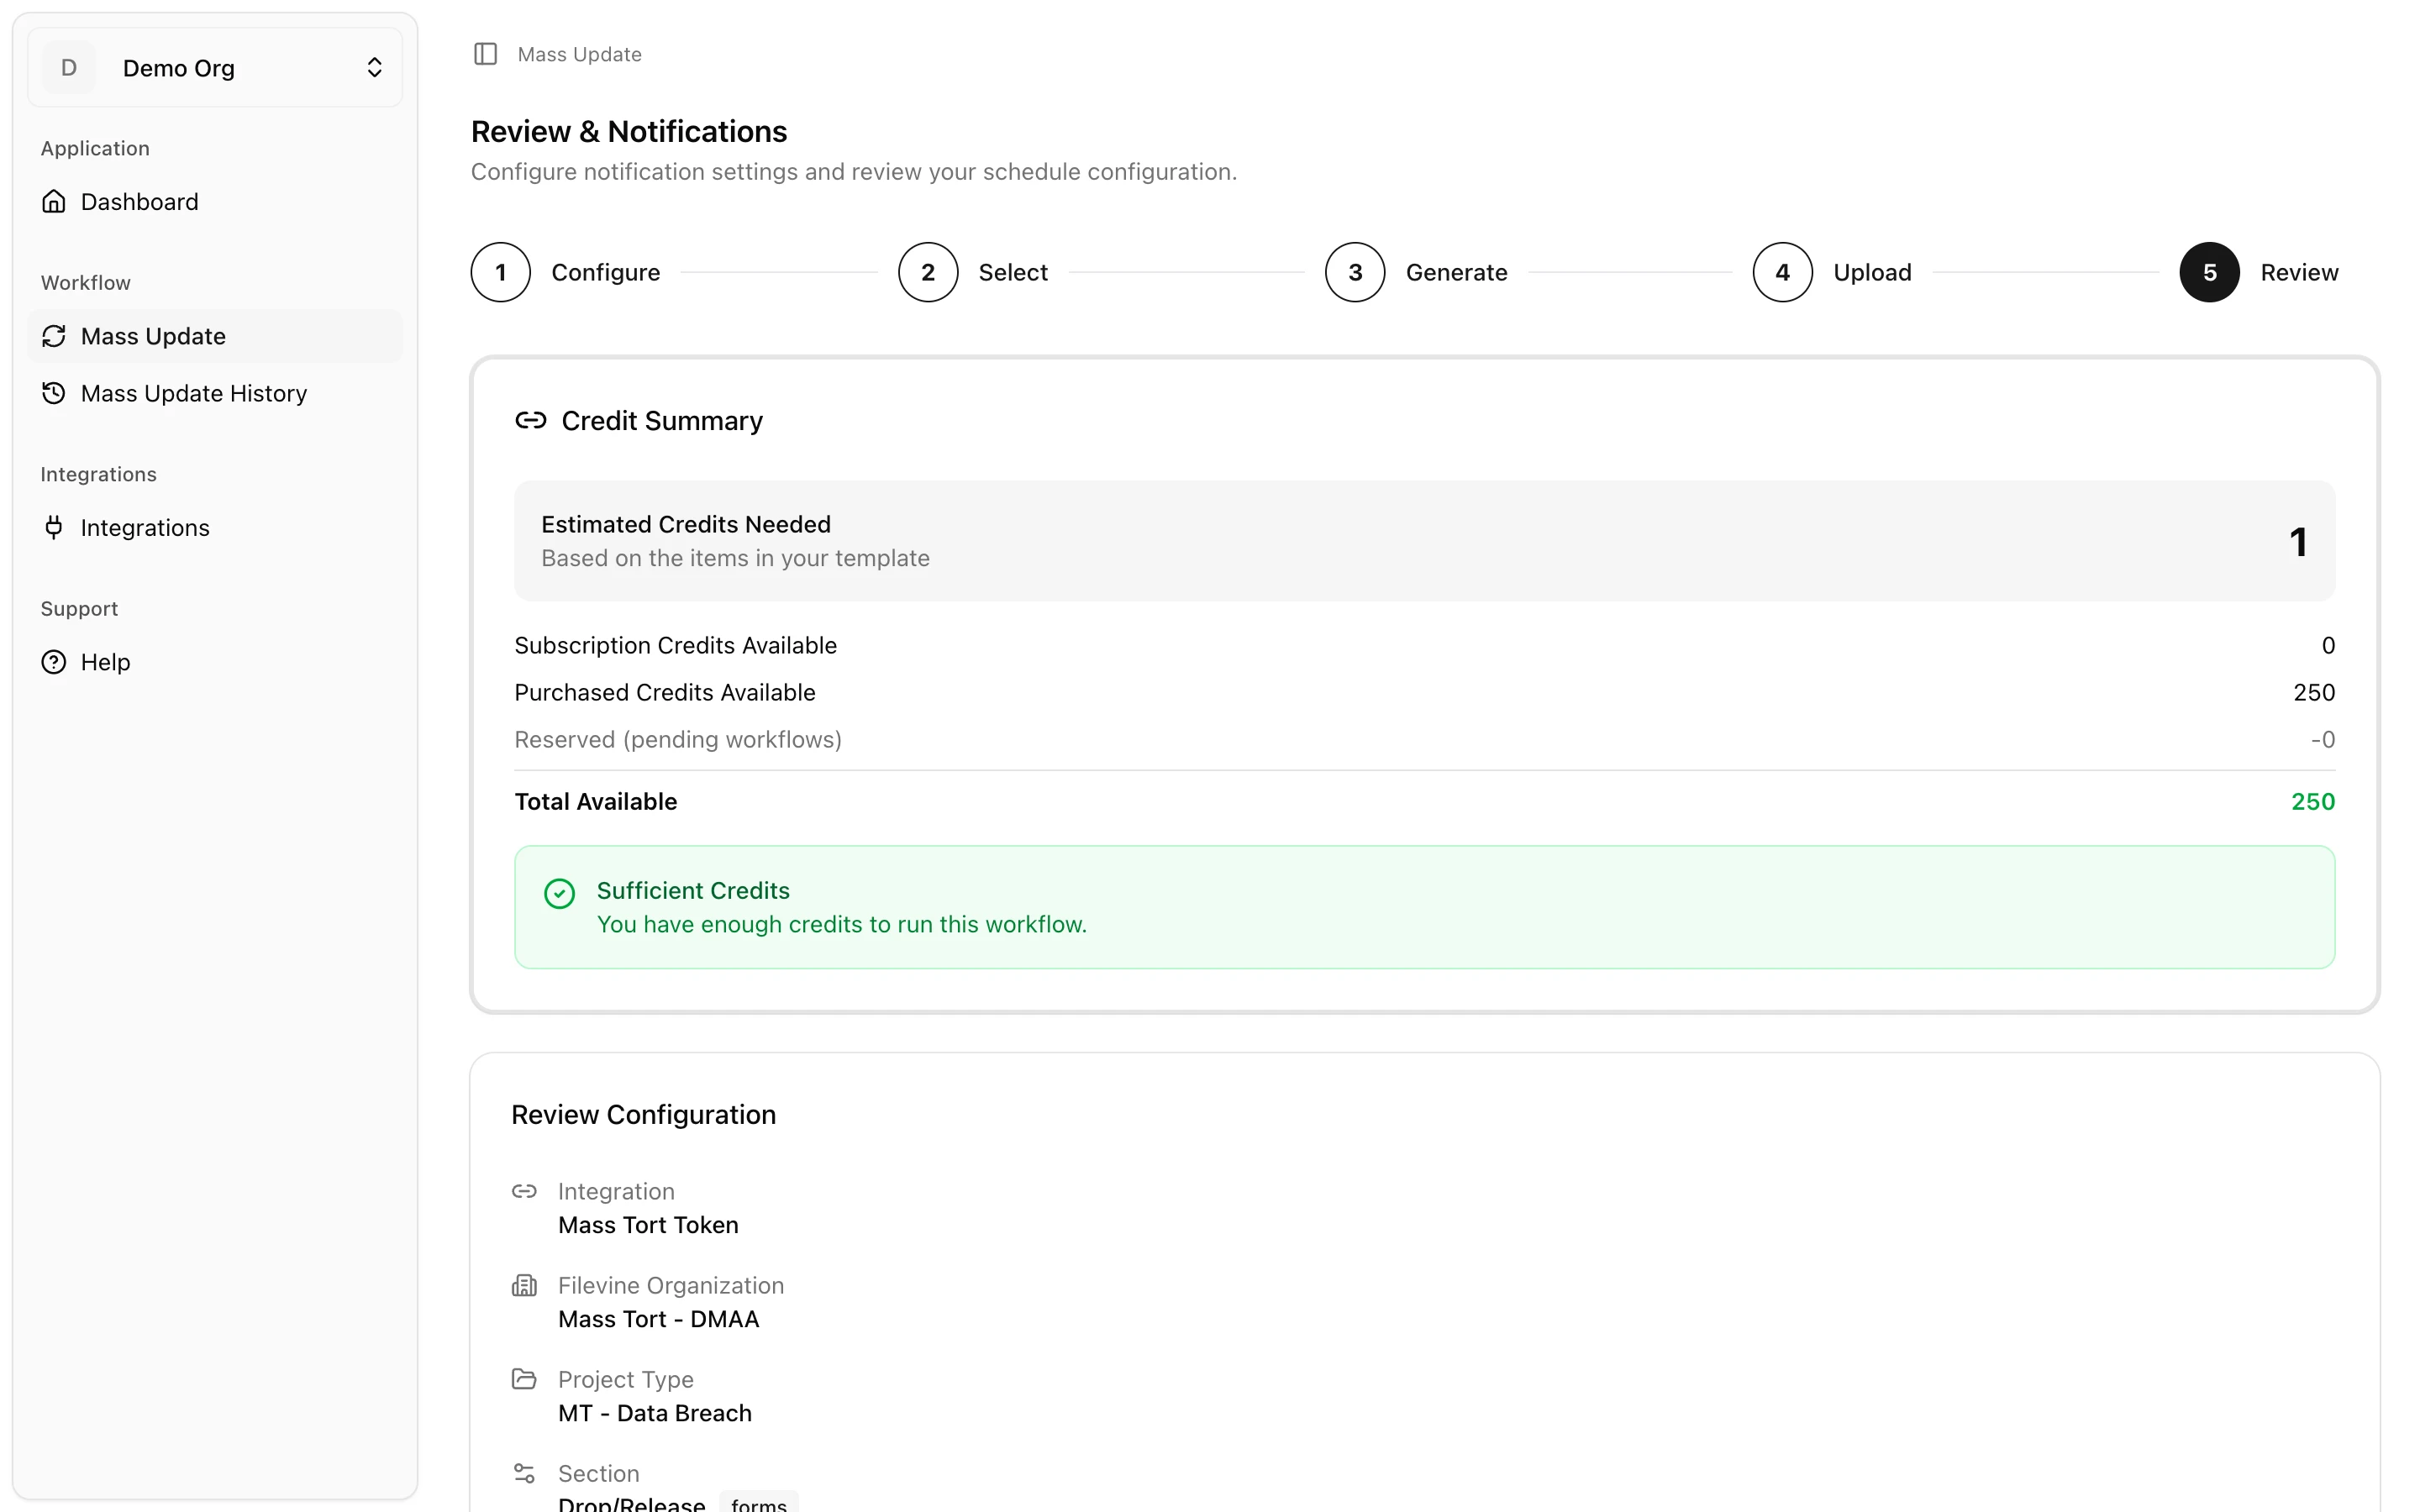
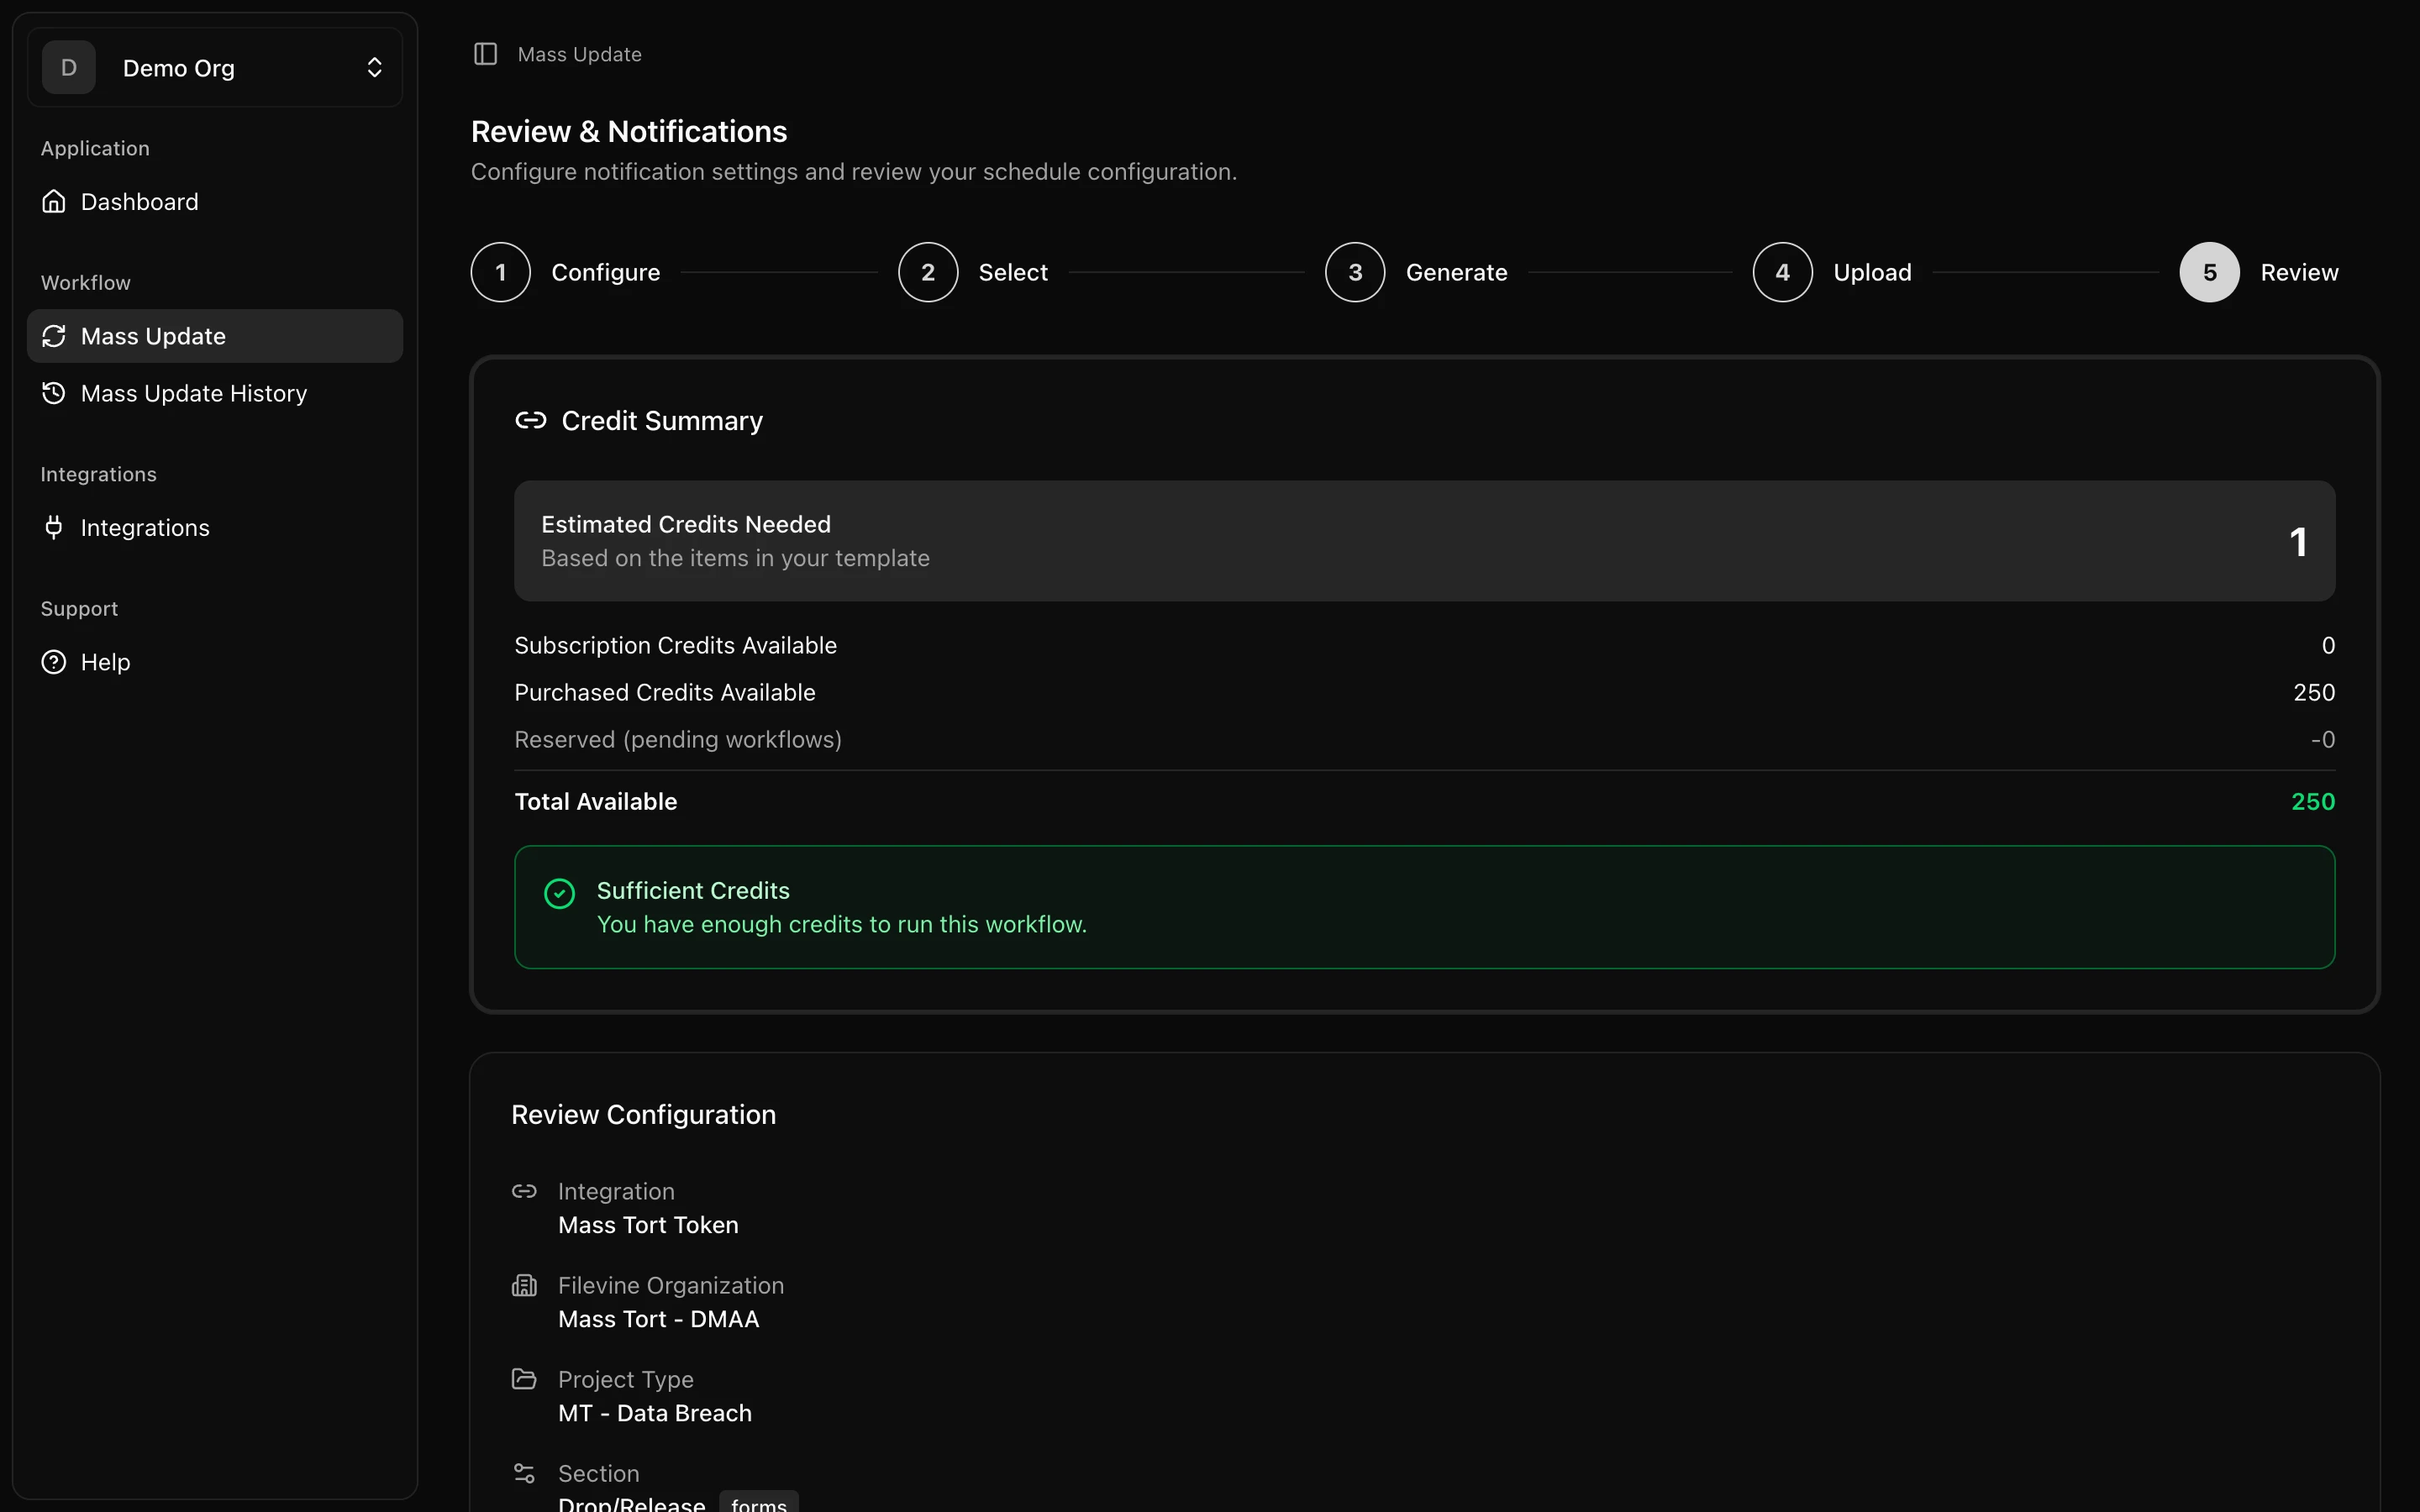
Step 4 — Confirm the credit cost
Next, VineMerge shows the cost of the run: total rows × 1 credit. Your current balance is shown alongside it, so you can see at a glance whether you have enough.
If you're short, pause here — you can top up with an add-on credit pack and come back to the same run without re-uploading your CSV. Unchanged and skipped rows are not billed; you're only charged for rows that actually get written.
Step 5 — Commit and verify
Click Run update. VineMerge processes the rows and writes the changes back to Filevine. For most firm-sized runs this takes anywhere from a few seconds to a couple of minutes — you'll see a progress bar, and you can leave the tab; the run continues in the background.
Once the job is marked complete:
- Pick any row from the run.
- Open that project in Filevine.
- Confirm the field now reflects the value from your CSV.
That's your first bulk update done. Every future run follows the same five steps.
What to do if something goes wrong
Bulk updates sound scary the first time, which is why VineMerge gives you two safety nets:
- Audit trail. Every run is logged. You can see exactly which rows were changed, the before and after values, who ran it, and when. Nothing happens invisibly.
- Rollback. Any completed run has a rollback option that reverses the changes it wrote — useful if you catch a mapping mistake after the fact.
If you hit an error mid-run, or rows are failing for reasons you can't explain from the preview alone, head to Troubleshooting for the common causes and fixes.
Need help with this topic right now? Contact support.